Cooking

Happy Thanksgiving! Gluten Free Homemade Stuffing Recipe

Happy Thanksgiving!

This year Thanksgiving lunch will be delicious and gluten free:-)
We will be making boneless turkey breast wrapped in pancetta and homemade gluten free stuffing with:
sweet carrots, flavorful parsnip, crunchy celery, red onion and just a few strips of goodness of pancetta to compliment flavor of the bird.

You will need these ingredients:

1 loaf gluten-free sandwich bread, Rudi♥s, diced into 1-inch cubes
1 large red onion, peeled and diced
2 stalks celery, diced
4 medium carrots, diced
1 parsnip, diced
2 large eggs
4 strips pancetta,chopped
4 cups chicken stock, heated

Heat the oven to 350°. Spread the bread cubes out on a baking sheet. I love to sprinkle bread with extra virgin olive oil and sea salt. This is optional.
Put the baking sheet in the oven and toast the bread. After 10 minutes or so, toss the bread cubes around to another side. When all sides are toasted, about 20 minutes.

Set a large skillet over medium heat. Pour in the olive oil. When the oil is hot, add the onion, celery, carrots, parsnip. Cook, stirring frequently, until the onions are golden. Add bacon and cook for another 5 minutes.

Toss stuffing together with the bread cubes. Put them all into a greased 8 x 12-inch casserole pan.
Whisk the eggs vigorously and slowly drizzle into the hot stock.
Pour this stock evenly over the stuffing. Cover the casserole pan with foil.

Bake the stuffing for 30 minutes, then take off the tin foil. Bake additional 10 minutes until the bread cubes are firm.
If you like you can pop the dish under the broiler for few minutes for nice golden crust.
What an amazing side dish. Flavor is rich, you can tell that is homemade, feels good.
Happy Thanksgiving!

Mac and Cheese, Creamy and Smoky made from Scratch for Fathers Day

Well, have to use my excuse ticket because last few months I was really busy starting and working on my Fondant store
Petit Fondant Creations. Still, I had to find time to make a post for Father’s Day and my lovely blog.
My husband is a brilliant dedicated hard working dad and we are so proud of him.
When I asked him what would he like me to prepare for the lunch today, he surprised me,”How about something with cheese?”.

I wanted to make Mac and Cheese from scratch for a long time so this was the perfect opportunity.
Off course, had to spice things a little bit, so I included wonderful Salame Secchi in the recipe which is slow aged pork salame without gluten, no MSG and 0g Trans fat, it added fantastic kick to the dish.
For the choice of cheeses I decided on: Aged Cheddar sharp, Creamy Goat cheese and Parmesan cheese.
My kids love goat cheese and I think it’s a great addition to the Mac and Cheese, it adds creamy texture and perfect amount of flavor to the dish.
For the extra cool serving experience I decided to bake and serve Mac and Cheese in individual oven safe dishes.
There is something really cool about home made Mac and Cheese.
It is sooooo good, creamy, tasty dish and gets better in every bite.

Ingredients:

1/2 pound elbows macaroni
3 brown large eggs
1 1/2 cups evaporated milk
1/4 teaspoon all spice
1 cup grated sharp Cheddar cheese
1/2 cup finely grated Parmesan Cheese
1/2 cup Goat cheese
1 cup Salame Secchi, cut into small pieces
sea salt, as desired

Preheat oven to 450F.
In a large pot of boiling water cook macaroni as directed on the package, around 8 minutes. Drain and set aside.
In a large bowl, whisk together the eggs and evaporated milk. Add salt, all spice, cheeses and salame, mix well.
Add pasta and stir well to combine.Transfer macaroni mixture to individual oven proof ramekins. Gently spread the mixture to foam an even layer. Sprinkle with extra parmesan cheese on top.
Bake until sauce is bubbling and golden crust is formed.

Let it rest for few minutes before serving. Enjoy!
Happy Father’s Day to all the hard working dad’s!

Chiles Rellenos, Homestyle

Chiles Rellenos is one of my favorite dishes. We had it more then few times in different restaurants, differently prepared. Sometimes served with sauce over them, sometimes without.
Always, delicious. After debating with myself when I will try to prepare this amazing dish for my family, finding fresh and best quality peppers are must….it takes effort but it’s worth it. Can’t wait to make them again:)

For the cheese choice I decided to try Spain’s Manchego Viejo. This is 100% sheep’s milk cheese with rich taste, it melts but it stays in the peppers( it will not overmelt).

Ingredients:

4 poblano chiles peppers, charred and peeled
1/2 pound cheese, cut into strips
2 eggs, beaten
sea salt, for taste
extra virgin olive oil, for frying
1/2 cup all-purpose flour for coating

Roast the chiles on a hot grill, burner or in a broiler on high heat.

Turn them occasionally until the skins are blackened and charred. When the skin of the chiles is blistered, remove from the heat and store them into bag sealed, let them cool to room temperature so you don’t burn yourself.

Peel the skin from the cooled chile, rinsing your fingers if they become sticky. Be careful to not tear the chile while peeling it. You are going to make a small slice into the side of the chile, just big enough to scrape the seeds and the white membrane out.
Place a slices of cheese into the chile. Don’t over-stuff it.

Place the chiles on the flour and sprinkle the rest of the flour on top. Use your fingers to make sure the entire chile is coated. Dust off remaining flour and set chiles aside.
For a batter, whip 2 egg whites until they are stiff. Stir up the remaining yolks and slowly fold them in with a pinch of salt. Use approximately 2 large eggs for each pound of chiles.
One at a time, hold the chiles by the stem and dip the stuffed chiles into the batter.

Carefully place them into a pan with hot oil. Cook each side until batter is a crisp golden brown.
Serve immediately with your favorite salsa, black beans and tortilla chips on the side.
¡Buen apetito!

HAPPY NEW YEAR! Creamy Chestnut Cake

Happy New 2012!
Wishing you all Healthy, Happy and Successful New Year!
Now let’s talk dessert, perfect for the Holidays.
When I was a kid growing up in Europe I remember people selling roasted chestnuts on the street wagons in winter time. They serve them hot and toasty in the paper trays. To keep this chestnut tradition on I usually like to make chestnut puree over winter months, which is a faster idea to enjoy lovely chestnuts but since it is a Holiday, New Years Eve and my birthday too, I decided to make a special cake.

Crust is a similar to cheesecake crust with added almonds to the Graham crackers. What I love about this cake is that there is no baking involved so it is very quick and delicious dessert to be made. You only need trusty food processor and you are all ready.

Creamy Chestnut Cake

For the crust:

1 cup low fat Graham crackers, ground
1/2 cup almonds, ground
1 spoon honey
1 orange, fresh juice
1 spoon brown sugar

For the chestnut filling:

2 cups chestnuts, peeled, cooked and grounded
1/2 cup powdered sugar
2 spoons non fat milk
1 teaspoon organic vanilla sugar

Chocolate layer:

1 cup semi sweet chocolate chips
1 teaspoon butter
For the top and finish, freshly whipped heavy whipping cream and extra drizzle of chocolate. It makes it even more special:)

To make a crust, using processor, grind first crackers then almonds. Set them aside in the mixing bowl.
In the small sauce pan over medium heat, bring to boil, sugar, honey and juice from one orange.
Add to ground ingredients and make a paste looking mix.
Prepare the serving plate and using spoon shape the mix to a circle.
Base is done.

Now again using processor, grind chestnuts, adding sugar and milk. Pulse few times and you will notice that they will start become like a paste. When done, add another layer to the cake.
For the chocolate lovers I love to add chocolate layer.
Using double broiler add chocolate, butter and melt till chocolate is smooth not too watery. Combine nicely and add another layer to the cake.
Using mixer finish whipping cream and add another layer.
Set the cake in the refrigerator few hours or over night before serving. This cake can be made in advance which makes it even more helpful.

Serve and enjoy.
Thank you so much for reading my blog and leaving wonderful comments. I hope you like all the recipes and ideas. It will be even more interesting in the next year!
Happy New Year!

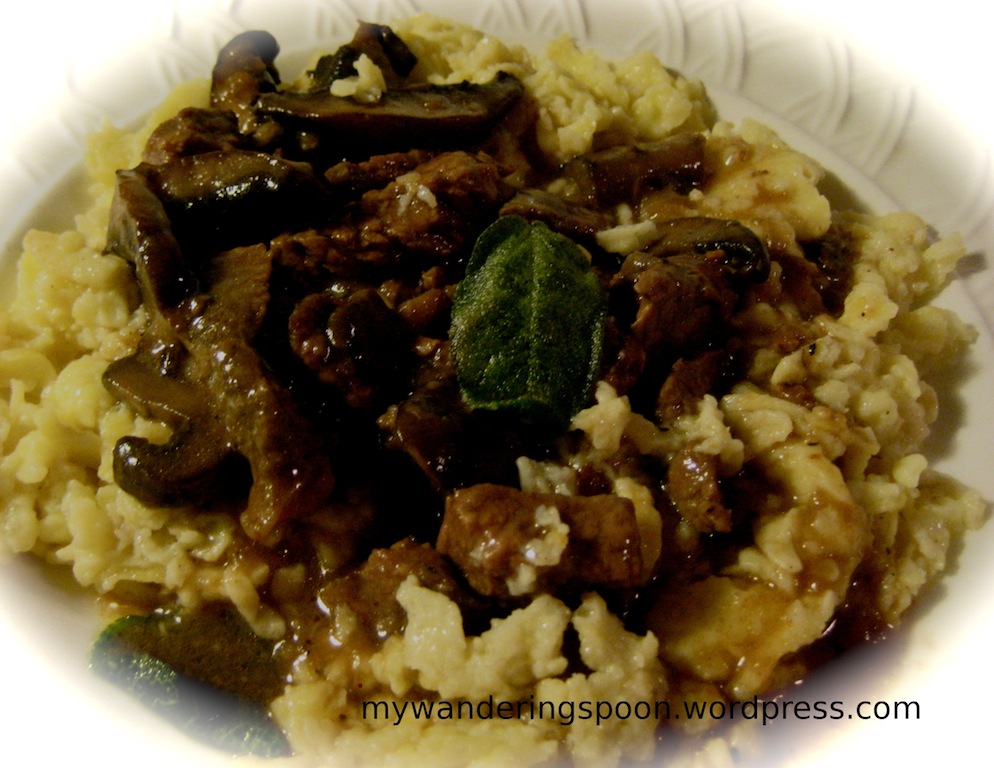
Spaetzle with Baby Bella Mushrooms and Beef Stew

Well, Winter is coming for sure even here in California and LA, mornings and evenings are cold. This morning it was 35 F. I finally decided to buy a warm jacket, sorry friends but can’t act like it’s Summer time anymore, flip flops and tank tops have to wait until Spring time:)
It is amazing how people appetite change with weather patterns. When cold, we crave meals with more texture, spices and added sides with starch, pasta or potatoes.
This recipe my mom used to make when I was a kid and I wanted to give it a try. It takes a little more time and effort but it is wonderful meal to enjoy. Kids and adults love the Spaetzle.
This kind of pasta is very versatile. You can eat it plain with little sprinkle of Parmesan cheese, you can add roasted vegetables or meat dish on the side. They go well with roast or stew. I had some fresh baby bella mushrooms in the fridge so I quickly made good stew with: lean beef, red onion, chicken stock, mushrooms, little paprika and spices. I know that everybody has their favorite type of stew and best working formula that they make for years now.

Super yummy:)

Spaetzle

You will need:

1, 1/2 cup all purpose flour
4 medium fresh eggs
sea salt, for taste
cold water, sprinkle
1/2 tea spoon all spice
fresh sage leaves
1/2 stick butter, slowly melted and caramelized

Using mixer start combining flour and salt. Gradually beat in the eggs one by one and water until you got the batter that is nice consistency.

Let mix rest in fridge for couple of hours.
Melt the butter in the small pot just till butter starts to turn golden in color.

Set aside.
Bring a large pot of water to boil. Prepare another bowl with ice water and ice cubes.
Ladle dough using upside down colander.

Scrape through the wholes. When just cooked Spaetzle will rise to the surface.

Transfer pasta to the ice bowl. Repeat the process till you have mix available. Drain Spaetzle and set aside.
Using large non stick pan heat prepared butter and add half of the Spaetzle. Fry till lightly brown.

Season with salt, all spice and fresh sage. Serve hot with your favorite toppings or stew.
Guten Appetit!

Broccoli Salad

So, here is the thing about broccoli. I like them but I like them even better if they are dressed up nicely. There are many broccoli salad recipes all mixed up with mayo or dressing some sweet, some spicy….To be honest with you I was kind of hungry today, it was raining too and I wanted to eat broccoli, so I made this salad and it was very, very good:)
Here is the proof:

You will need around 20 minutes to make this salad and several good quality ingredients.
To start I blanch the broccoli for few minutes just to make them a little bit softer.
For the bacon I like to use oven roasting method….around 17 minutes in the preheated oven on 400F, delicious crunchy slices of bacon are done…..and stove top stays clean.
For the dressing, I used 1 tablespoon of Greek yogurt (which I love), vigorously mixed till becomes smooth and liquidy. I grated in a clove of garlic, some salt and pepper, lemon juice and fresh chopped chives from the garden. They added additional garlicky taste to the dressing which will give broccoli perfect taste.
Also had a hard boiled egg from this morning in the fridge so I added egg too.
Hmmm….something was still missing, o yes, generously shaved Parmesan cheese.
And there it is, lunch all ready and served.
On the plate there are wonderful vegetables high in vitamin C and folate, good source of dietary fiber and potassium, protein powerhouse and some calcium too. I feel like I did something good today for myself, treat my body well with delicious freshly prepared broccoli salad.
Enjoy.

Frittata with Corn & Feta Cheese

I love making frittata on the weekend mornings but even during the week for the healthy and hearty breakfast it is a great idea. Adults and kids love the recipe and this tasty combination. It will warm your heart and tummy and give you head start for the busy morning schedule.
While sun is slowly rising, fresh coffee is brewing, orange juice is in the glasses, whole wheat toast is done and frittata all ready, everything in only 20 minutes.
Fabulous:)

You will need:

8 medium brown eggs, beaten
1 cup light feta cheese, crumbed
8.5 oz golden whole kernel corn, canned-drained
fresh ground black pepper, to taste
sea salt, to taste
1 tea spoon extra virgin olive oil

Preheat oven to broil setting.

In the medium size bowl, using whisk, blend together eggs, salt and pepper. Heat 12-inch non-stick, oven safe saute pan over medium high heat. Add oil to pan. Then add corn to a pan and saute for 2 to 3 minutes. Pour egg mixture into pan and stir with rubber spatula. Cook for 4 to 5 minutes or until the egg mixture has set on the bottom and begins to set up on top. Sprinkle with feta cheese.
Place pan into oven and broil for 3 to 4 minutes, until lightly browned and fluffy.

If you like you can top slices of frittata with a touch of creme fraiche.
Serve immediately.
Have a great breakfast!

THE Amazing Sandwich – My Way

Everybody loves good sandwich.
Cold, hot, pressed or open face, pretty much, they all taste very good.
Still to get the amazing tasting sandwich, fresh and quality ingredients and nice combination are the key.
You know me, always watching for quantity of fats, sugar and spreads, everything in moderation:)
I made trips to several stores to get all the ingredients for my sandwich, you can’t find them all in one store.
Proudly, I present you my The Amazing Sandwich

Shopping list:

Bread:
Pain Rustique rolls

Meat and protein:
Prosciutto
Bacon, grilled
Turkey breast, deli sliced
Hard boiled egg
Smoked Mozzarella cheese

Spread:
Homemade Aioli with capers

Condiments:
Kalamata Olives, pitted
Red fire roasted peppers

Greens:
Baby Aragula greens

On the side:
Banana waxed peppers
Castelvetrano Whole Green Olives

Homemade Aioli recipe:

2 egg yolks, fresh
2 garlic cloves
1 tbsp lemon juice
1 tbsp white wine vinegar
pinch of salt
1/4 cup capers
1/2 cup olive oil

Mince garlic and a pinch of salt until smooth.
Put egg yolk in a bowl, add about half the garlic paste and 1/2 teaspoon water. Mix well with a whisk.
Using cup with a pour spout, slowly dribble in oil, whisking constantly. As egg yolk absorbs oil, sauce will thicken, lighten in color. Then you can add oil a little faster, whisking all the while. If the sauce is thicker than you like, thin it with a few drops of lemon juice and white vinegar. Add capers and combine. Store in the fridge.
If you don’t like to use fresh egg yolks you can use store bought mayo and add garlic, lemon and capers.

There it is, Mediterranean inspired sandwich, for hungry adults, boys and girls:)
Taste- Fantastic:)

My Mom’s Stuffed Eggplant Recipe

Last night I spoke to my mom over the phone and she was telling me about this wonderful dish that she prepared for my dad and herself yesterday for lunch. My dad took few photos and it sounded so delicious I promised that I would love to add this recipe to my blog….I could tell they were proud:)
It is very hard to live so far from each other, Europe and States are ocean away….and it is not always possible to travel so often. Phones, Skype and blog are great help to stay in touch almost every day:)
This is vegetarian style recipe. Very tasty and healthy dish, fully recommended from my mom’s trusty kitchen:)

You will need:

2 medium eggplant
2 tablespoons extra virgin olive oil
sea salt and freshly ground black pepper, to taste
2 cloves garlic, minced
1/2 cup freshly chopped basil leaves, chopped
3 fresh tomatoes
1 cup Parmigiano Reggiano

Preheat oven to 350 degrees F.
Wash and cut the eggplants in half and scoop out the center, leaving enough meat inside the skin so that it holds its shape when baked.
Using the large skillet over medium fire, heat the olive oil and sauté the scooped-out center part until nice and brown, about 10 to 12 minutes. Add two peeled, diced tomatoes, garlic, basil, season with salt and pepper. Fill the scooped-out eggplant halves with this mixture, dividing it evenly. On the top of every half add fresh tomato circle and sprinkle with grated Parmesan cheese.
Place stuffed eggplants in baking dish and bake for 30 minutes.
Garnish with fresh basil leaves and extra Parmesan cheese if you like.
Serve warm and enjoy.

Fresh Baby Carrot Cream Soup and Happy Start of the New School Year:)

Here we are again, another school year began today in our town.
This morning, while dropping off kids to schools I realized that relaxing Summer break is over while watching totally crazy traffic around the school sites.
Wow, that was intense, what a change.
Last night my kids and I had a talk about lunch boxes and what kind of menu ideas they have to pack them for school lunches. Besides usual, like pasta or healthy sandwiches they asked for soup too.
Since they love baby carrots, I decided to make Fresh Baby Carrot Cream Soup.
It was ultimate carrot soup, so good. This recipe is perfect for adults too, soup is packed with antioxidants plus it is low in fat.

I completely recommend this recipe for to pack & go option or when kids are back from school and they need something homemade to warm their tummies.
Extra fast and easy to make soup, plus most people always have that bag of baby carrots in the fridge, how convenient is that?

Fresh Baby Carrot Cream Soup

1 lb fresh baby carrots
1 medium red onion, peeled and grilled
1 apple, peeled and cored
1/2 teaspoon whole black peppercorns
1/2 bunch Fresh Italian Parsley
sea salt, to taste
5 cups of water
1/2 cup low-fat sour cream
1/2 cup non-fat half and half

Making this recipe is super convenient because while we making the soup, we are making the vegetable stock too. To start making your own vegetable stock, first grill the peeled onion on the stove burner, each side for few minutes. This process will add amazing aroma to the soup. Using large cooking pot add carrots, grilled onion, apple, parsley, water, salt and peppercorns to taste. Cook the stock for 45 minutes over medium heat.
Using colander drain the liquid in the extra pot, save for later.
Using blender add carrots, apple, onion, sour cream and half and half.
Start blending and slowly adding vegetable stock till you reach desired soup consistency.
Season with sea salt and extra pepper if you wish.
Serve warm.
Soup is light, creamy, airy and delicious.
Perfect with side of fresh bread and little butter on the side.
Happy School Year!

Nutrition info:
Carrots are packed with Vitamin C and phytonutrient antioxidants. Carotenoids, alpha-carotene, beta-carotene, lutein. Also there is good source of Vitamin K and Dietary fiber.